 修图师
修图师这次的视频主要讲了我是如何压暗面部高光,修复过曝部位的。
在某些PS营销号儿里也把高光叫做油光,其实高光这东西不是个坏东西,有它的存在才能显出片子的通透。如果按照某些营销号的操作方法去掉脸上的高光会影响整个面部的光影结构和立体感,但是如果高光确实过于强烈,我们有时候还是需要故意压暗它。
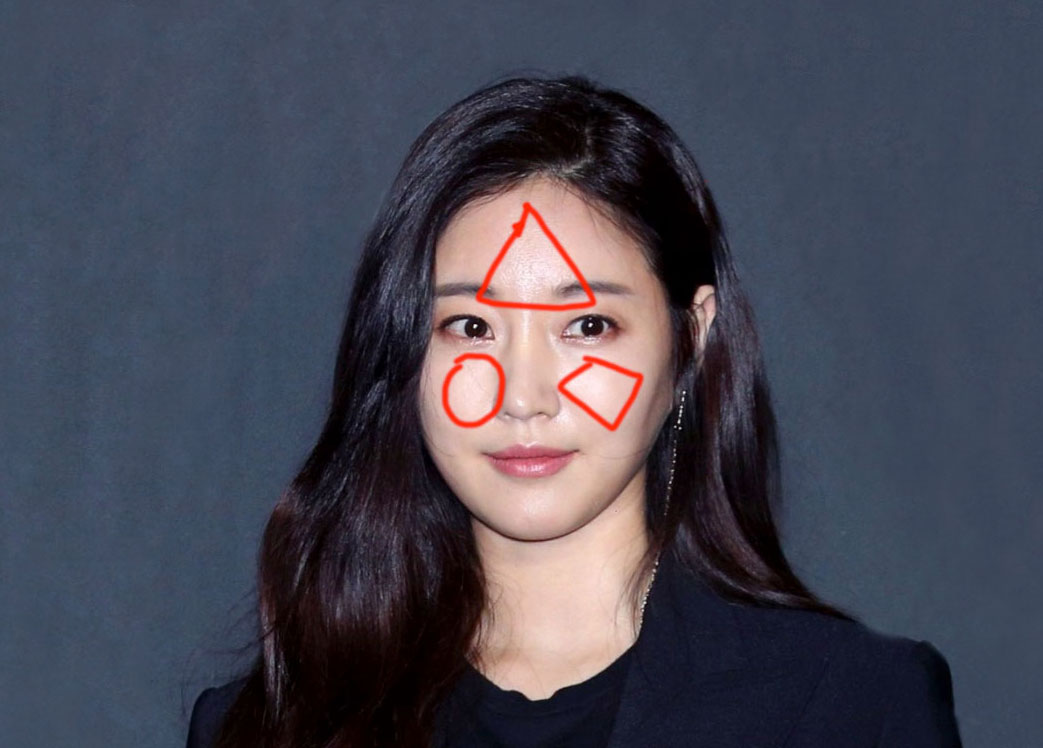
这里线纠正一下,并不是人物面部有的位置过亮就是皮肤出油而产生所谓的油光,也可能是打了亮粉或者其他一些提亮的粉底。后我们要明白人的面部是有结构的,比如额头、眼眶、鼻子和颧骨等位置,都是比较凸起的,属于受光位置,所以亮度高于其他部位,在灯光足够强的时候这些位置地亮度会比较明显,形成比较鲜明地高光区域。
我在网上找了一张相对应的照片,这个人好像是个韩国艺人,具体是谁咱们就不管了。我们可以看见,这是一张某活动现场的照片,因为灯光或者其他原因,人物面部有几处亮度比较明显,这就是之前说的高光位置。
下面我将采用两种方法来处理高光,第一种就是那些PS课程营销号们介绍的通道抠图法,我将高光完全去除;第二种就是利用透明图层修复,我会将高光柔和一下,但是并不完全去除。
具体操作大家可以看视频,素材我手边没有了,有需要的朋友可以利用百度图片搜索功能来寻找类似的 素材。